Essential Steps to Maintain and Clean the CB650F Air Intake
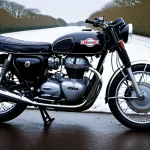
Maintaining the Honda CB650F air intake is crucial for ensuring optimal engine performance. The air intake system regulates the flow of clean air into the engine, directly affecting combustion efficiency, fuel economy, and overall ride quality. Neglecting maintenance can lead to reduced power and increased fuel consumption.
For effective motorcycle air intake care, Honda recommends routine inspections and cleanings every 12,000 miles or sooner under dusty conditions. This interval helps prevent clogging and preserves airflow.
Also to discover : Maximize Your Riding Experience: The Advantages of Upgrading the Exhaust System on Your Honda VFR800
Before starting the maintenance, gather the necessary tools and materials:
- A clean workspace with proper lighting
- A Phillips screwdriver to remove the airbox cover
- A soft brush and compressed air for cleaning debris
- Replacement air filter or cleaning kit if applicable
Following this step-by-step air intake cleaning routine ensures you avoid contamination or damage during maintenance. Always wear gloves to prevent oils or dirt from transferring to the filter. By adhering to these guidelines, you maintain consistent airflow, prolong the lifespan of your Honda CB650F air intake system, and keep your motorcycle running smoothly.
Topic to read : Proven Strategies to Minimize Handlebar Vibration on Your Suzuki V-Strom 650 for a More Comfortable Ride
Comprehensive Cleaning Procedures for Optimal Airflow
Maintaining optimal airflow in your Honda CB650F relies heavily on thorough, precise cleaning of the air intake system. The CB650F air filter cleaning process begins with carefully removing the airbox cover using a Phillips screwdriver. Next, gently extract the air filter, taking care not to damage its edges or fold it.
Inspect the filter closely for dirt, dust, and any signs of wear. If it appears clogged or degraded, replacement is advisable to preserve engine efficiency. For cleaning, use a soft brush to loosen debris and compressed air to blow out residual particles. Avoid using high-pressure air directly on the filter, as this may cause damage to the delicate mesh.
During the cleaning process, ensure no contaminants enter the airbox. Wear gloves to prevent oils or dirt from transferring to the filter surface. Once cleaned or replaced, reassemble the air intake components, sealing the airbox cover securely to maintain airtight conditions.
Following these step-by-step air intake cleaning procedures not only supports better combustion but also helps prevent premature engine wear. Regular cleaning especially benefits riders in dusty environments by sustaining steady airflow within the intake system, thereby enhancing overall performance on your Honda motorcycle.
Troubleshooting Common Air Intake Issues on the CB650F
Identifying CB650F air intake problems early prevents diminished performance and costly repairs. Common symptoms of a clogged air filter include reduced engine power, rough idling, increased fuel consumption, and unusual exhaust smoke. These signs indicate restricted airflow, which compromises combustion efficiency.
To troubleshoot motorcycle intake issues, start by visually inspecting the air filter for dirt accumulation or damage. A heavily soiled or torn filter requires immediate cleaning or replacement. Next, check for vacuum leaks around the air intake system, as leaks can cause inconsistent airflow and erratic engine behavior. Listen for unusual sounds during acceleration that might indicate air bypassing the filter.
If performance issues persist despite a clean filter, examine the throttle body and intake manifold for carbon buildup or debris. Cleaning these components can restore proper airflow and throttle response. Additionally, consider environmental factors; frequent riding in dusty or polluted areas demands shorter intervals between air filter maintenance.
Preventing recurrence involves adhering to a regular Honda CB650F air intake maintenance schedule and using quality filters. Applying a step-by-step air intake cleaning routine reduces clogging risks and optimizes your motorcycle’s breathing. Early detection and prompt attention ultimately safeguard engine longevity and ride quality.
Troubleshooting Common Air Intake Issues on the CB650F
Recognizing CB650F air intake problems early is vital for maintaining engine performance and efficiency. Common signs of a clogged air filter include a noticeable drop in power, rough idling, and increased fuel consumption. Riders may also experience delayed throttle response or engine misfires, indicating restricted airflow in the intake system.
To effectively diagnose motorcycle intake issues, begin with a thorough visual inspection of the air filter and intake components. Check for visible dirt buildup or damage to the filter element. If the filter is excessively dirty or brittle, replacement is the safest option to restore proper airflow.
Another key diagnostic step is to observe engine behavior under different loads. Reduced acceleration or hesitation often points to air intake restrictions. Additionally, ensure the airbox is sealed correctly, as leaks can introduce unfiltered air and cause performance inconsistencies.
Resolving these issues involves cleaning or replacing the air filter promptly and inspecting surrounding components for damage. Routine CB650F air intake maintenance also minimizes recurrence by preventing debris accumulation. Regular attention to these signals supports sustained motorcycle performance and helps avoid costly repairs related to intake blockage.
Maintenance Schedules and Best Practices for Longevity
Adhering to a CB650F air intake maintenance schedule is vital to preserve engine health and performance. Honda advises inspecting and cleaning the air intake every 12,000 miles, but this interval should be shortened in dusty or polluted environments. Riders who frequently navigate off-road or urban areas with heavy particulate matter benefit from more frequent checks, preventing premature filter clogging.
Creating a personalized motorcycle maintenance checklist helps track when to perform air filter replacements and cleanings. Note signs like reduced engine responsiveness or increased fuel consumption, which indicate it’s time for service. Regularly scheduled maintenance prevents costly repairs by avoiding excessive buildup that impairs airflow.
Best practices include using high-quality replacement filters and cleaning supplies designed specifically for the CB650F. Always handle filters with clean gloves to avoid introducing oils or debris during reinstallation. Additionally, ensure the airbox is sealed firmly after maintenance to maintain airtight conditions, critical for consistent air supply.
By following these routines and adapting them based on riding conditions, you extend the lifespan and efficiency of your Honda CB650F air intake maintenance. This proactive approach guarantees steady engine performance and enhances overall ride reliability.
Essential Steps to Maintain and Clean the CB650F Air Intake
The Honda CB650F air intake maintenance is essential to preserve engine efficiency and smooth performance. The air intake’s primary function is to channel clean, debris-free air into the combustion chamber. Any restriction or contamination can reduce power and increase fuel consumption. Therefore, careful motorcycle air intake care is vital.
Honda advises performing step-by-step air intake cleaning every 12,000 miles, or sooner when riding in dusty or polluted environments. This interval helps prevent dirt buildup that compromises airflow. Following this schedule supports optimal combustion and engine longevity.
Before beginning maintenance, gather these critical tools and materials: a Phillips screwdriver to access the airbox, a soft brush for delicate debris removal, compressed air for gentle cleaning, gloves to prevent filter contamination, and replacement or cleaning kits for the air filter if necessary.
Starting with a clean workspace ensures thorough inspection and reduces contamination risks during cleaning. Proper preparation, combined with adherence to the Honda CB650F air intake maintenance routine, helps maintain steady airflow and extends the life of your motorcycle’s air intake system.
Essential Steps to Maintain and Clean the CB650F Air Intake
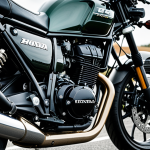
The Honda CB650F air intake maintenance is fundamental to ensure clean airflow reaches the engine. This process directly affects combustion efficiency, power output, and fuel economy. The air intake prevents dirt and debris from entering the engine, so any compromise in its condition impacts motorcycle performance adversely.
Honda recommends performing step-by-step air intake cleaning every 12,000 miles, or sooner in dusty or polluted environments. This schedule protects the system from clogging and maintains optimal riding conditions. Adhering to this service interval promotes engine longevity and prevents performance loss linked to restricted airflow.
Before beginning motorcycle air intake care, assemble essential tools: a Phillips screwdriver to open the airbox, a soft brush to gently dislodge dirt, compressed air for debris removal, gloves to keep the filter uncontaminated, and a replacement air filter or cleaning kit if necessary. A clean workspace with good lighting is also vital to avoid introducing new contaminants.
Starting maintenance with this checklist improves efficiency and minimizes damage risks, ensuring a thorough Honda CB650F air intake maintenance routine that keeps your motorcycle’s breathing system functioning at its best.